Kubernetes Cluster API Provider IBM Cloud

Kubernetes-native declarative infrastructure for IBM Cloud.
What is the Cluster API Provider IBM Cloud
The Cluster API brings declarative, Kubernetes-style APIs to cluster creation, configuration and management.
The API itself is shared across multiple cloud providers allowing for true IBM Cloud hybrid deployments of Kubernetes. It is built atop the lessons learned from previous cluster managers such as kops and kubicorn.
CAPIBM Supported Infrastructure-as-a-Service (IaaS)
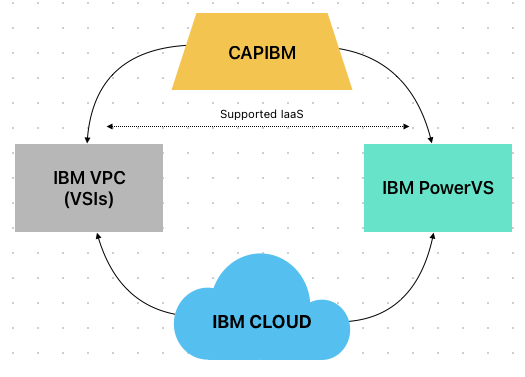
Currently, the CAPIBM project exclusively facilitates the deployment of Kubernetes (K8s) clusters solely on two IBM infrastructure offerings, namely IBM VPC (Virtual Server Instances) and IBM PowerVS.
Quick Start
Check out the getting started section to create your first Kubernetes cluster on IBM Cloud using Cluster API.
Tilt-based development environment
See developer guide section for details.
Documentation
Please see our Book for in-depth user documentation.
Additional docs can be found in the /docs directory, and the index is here.
Getting involved and contributing
Are you interested in contributing to cluster-api-provider-ibmcloud? We, the maintainers and community, would love your suggestions, contributions, and help! Also, the maintainers can be contacted at any time to learn more about how to get involved.
In the interest of getting more new people involved, we tag issues with
good first issue.
These are typically issues that have smaller scope but are good ways to start
to get acquainted with the codebase.
We also encourage all active community participants to act as if they are maintainers, even if you don’t have “official” write permissions. This is a community effort, we are here to serve the Kubernetes community. If you have an active interest and you want to get involved, you have real power! Don’t assume that the only people who can get things done around here are the “maintainers”.
We also would love to add more “official” maintainers, so show us what you can do!
This repository uses the Kubernetes bots. See a full list of the commands here.
Join us
The community holds bi-weekly meetings on Tuesday at 10:00 IST (Convert to your timezone) on Zoom.
Previous meeting notes, Subscribe to the SIG Cluster Lifecycle Google Group for access to documents and calendars.
Other ways to communicate with the contributors
Please check in with us in the #cluster-api-ibmcloud channel on Slack.
Github issues
Bugs
If you think you have found a bug please follow the instructions below.
- Please spend a small amount of time giving due diligence to the issue tracker. Your issue might be a duplicate.
- Get the logs from the cluster controllers. Please paste this into your issue.
- Open a bug report.
- Remember users might be searching for your issue in the future, so please give it a meaningful title to helps others.
Tracking new features
We also use the issue tracker to track features. If you have an idea for a feature, or think you can help Cluster API Provider IBMCloud become even more awesome, then follow the steps below.
- Open a feature request.
- Remember users might be searching for your issue in the future, so please give it a meaningful title to helps others.
- Clearly define the use case, using concrete examples. EG: I type
thisand cluster-api-provider-ibmcloud doesthat. - Some of our larger features will require some design. If you would like to include a technical design for your feature please include it in the issue.
- After the new feature is well understood, and the design agreed upon we can start coding the feature. We would love for you to code it. So please open up a WIP (work in progress) pull request, and happy coding.
Getting Started
For prerequisites, check the respective sections for VPC and PowerVS
Now that we’ve got all the prerequisites in place, let’s create a Kubernetes cluster and transform
it into a management cluster using clusterctl.
Provision local boostrap management cluster:
-
Create simple, local bootstrap cluster with a control-plane and worker node
Using kind:
~ kind create cluster --name my-bootstrap --config bootstrap.yamlExample bootstrap.yaml:
kind: Cluster
apiVersion: kind.x-k8s.io/v1alpha4
nodes:
   - role: control-plane
   - role: worker
Make sure the nodes are in
Readystate before moving on.~ kubectl get nodes NAME STATUS ROLES AGE VERSION my-bootstrap-control-plane Ready control-plane,master 46h v1.20.2 my-bootstrap-worker Ready <none> 46h v1.20.2 -
Set workload cluster environment variables
Make sure these value reflects your API Key for your target VPC environment or PowerVS environment in IBM Cloud.
export IBMCLOUD_API_KEY=<YOUR_API_KEY> -
To deploy workload cluster with Custom Service Endpoint, Set
SERVICE_ENDPOINTenvironmental variable in semi-colon separated format:${ServiceRegion1}:${ServiceID1}=${URL1},${ServiceID2}=${URL2};${ServiceRegion2}:${ServiceID1}=${URL1...}.Supported ServiceIDs include -
vpc, powervs, rc, cos, transitgatewayexport SERVICE_ENDPOINT=us-south:vpc=https://us-south-stage01.iaasdev.cloud.ibm.com,powervs=https://dal.power-iaas.test.cloud.ibm.com,rc=https://resource-controller.test.cloud.ibm.comNote: Refer Regions-Zones Mapping for more information.
-
For enabling debug level logs for the controller, set the
LOGLEVELenvironment variable(defaults to 0).export LOGLEVEL=5 -
Initialize local bootstrap cluster as a management cluster
When executed for the first time, the following command accepts the infrastructure provider as an input to install.
clusterctl initautomatically adds to the list the cluster-api core provider, and if unspecified, it also adds the kubeadm bootstrap and kubeadm control-plane providers, thereby converting it into a management cluster which will be used to provision a workload cluster in IBM Cloud.~ clusterctl init --infrastructure ibmcloud:<TAG>Note: If the latest release version of the provider is available, specifying TAG can be avoided. In other cases, you can specify any prerelease version compatible with the supported API contract as the TAG.
Example: clusterctl init –infrastructure ibmcloud:v0.2.0-alpha.5Output:
Fetching providers Installing cert-manager Version="v1.5.3" Waiting for cert-manager to be available... Installing Provider="cluster-api" Version="v0.4.4" TargetNamespace="capi-system" Installing Provider="bootstrap-kubeadm" Version="v0.4.4" TargetNamespace="capi-kubeadm-bootstrap-system" Installing Provider="control-plane-kubeadm" Version="v0.4.4" TargetNamespace="capi-kubeadm-control-plane-system" Installing Provider="infrastructure-ibmcloud" Version="v0.1.0-alpha.2" TargetNamespace="capi-ibmcloud-system" Your management cluster has been initialized successfully! You can now create your first workload cluster by running the following: clusterctl generate cluster [name] --kubernetes-version [version] | kubectl apply -f - -
Once the management cluster is ready with the required providers up and running, proceed to provisioning the workload cluster. Check the respective sections for VPC and PowerVS to deploy the cluster.
IBM Cloud Machine Images for CAPIBM Clusters
CAPIBM requires a “machine image” containing pre-installed, matching versions of kubeadm and kubelet. Machine image is required during the cluster creation in the IBMVPCMachineTemplate and IBMPowerVSMachineTemplate spec.
Pre-built public Images are published by the maintainers regularly for each new Kubernetes version.
Note: These images are only for the test purpose
VPC Images
| Region | Bucket | Object | Kubernetes Version |
|---|---|---|---|
| us-south | power-oss-bucket | capibm-vpc-ubuntu-2204-kube-v1-31-4.qcow2 | 1.31.4 |
| us-south | power-oss-bucket | capibm-vpc-ubuntu-2204-kube-v1-30-4.qcow2 | 1.30.4 |
Note: These images are built using the image-builder tool and more information can be found here
PowerVS Images
| Region | Bucket | Object | Kubernetes Version |
|---|---|---|---|
| us-south | power-oss-bucket | capibm-powervs-centos-streams9-1-31-0.ova.gz | 1.31.0 |
| us-south | power-oss-bucket | capibm-powervs-centos-streams9-1-30-0.ova.gz | 1.30.0 |
PowerVS Images with DHCP based network
| Region | Bucket | Object | Kubernetes Version |
|---|---|---|---|
| us-south | power-oss-bucket | capibm-powervs-centos-streams9-1-32-3.ova.gz | 1.32.3 |
| us-south | power-oss-bucket | capibm-powervs-centos-streams9-1-29-3.ova.gz | 1.29.3 |
Note: These images are built using the image-builder tool and more information can be found here
Topics
This section contains information about using IBM Cloud features with Cluster API Provider IBM Cloud.
VPC Cluster
Contents
Prerequisites
- Install
kubectl(see here). Becausekustomizewas included intokubectland it’s used bycluster-api-provider-ibmcloudin generating yaml files, so version1.14.0+ofkubectlis required, see integrate kustomize into kubectl for more info. - You can use either VM, container or existing Kubernetes cluster act as the bootstrap cluster.
- Install a driver if you are using minikube. For Linux, we recommend kvm2. For MacOS, we recommend VirtualBox.
- An appropriately configured Go development environment
- Install
clusterctltool (see here)
Build workload cluster image:
-
Build a qcow2 image suitable for use as a Kubernetes cluster machine as detailed in the image builder book.
Note: Rename the output image to add the
.qcow2extension. This is required by the next step.For more information about the images can be found at machine-images section
-
Upload the VPC Gen2 custom image to IBM Cloud following this section or the detailed explainations in the VPC documentation.
Uploading an image to the IBM Cloud
Build the Ubuntu image as described in the previous VPC section. Make sure to build the qcow2 version by following the instructions for ibmcloud vpc image build.
Since the IBM Cloud does not support dots before the qcow2 extension, rename the file as follows:
ubuntu-2004-ibmcloud-kube-v1-23-4.qcow2
Upload VM image:
- Create an IBM COS instance
- Create a bucket in the COS instance.
- Upload the image
- Upload via aspera
- Install the browser extension for Aspera
- Downloading the Aspera tool
- Selecting the image via Aspera dialog
- Upload the image via aspera
- Using minio cli
- Install minio cli
- Creating a service credential with hmac=true for the bucket
- Example upload for eu-de:
mc alias set uploadcos https://s3.eu-de.cloud-object-storage.appdomain.cloud <hmac access id> <hmac secret key>mc cp <image-name>.qcow2 uploadcos/<my-bucket-name>
- Upload via aspera
Add VM image to VPC
- Make sure you have editor rights for all/most VPC services
- Add additional read rights for:
src: service VPC Infrastructure Services resourceType equals image
target: serviceInstance string equals <your-Cloud-Object Storage-VM-plain-name>
Add write rights for:
Service VPC Infrastructure Services in Resource_group <your_resource_group_or_account> resourceType equals image
target: service Cloud object storage in resource_group <your_resource_group_or_account>
- Go to https://cloud.ibm.com/vpc-ext/provision/customImage
- Fill in imagename, resource group or account
- Choice box: Cloud Object Storage
- Set Filter: <your_cos_plain_name> <eu-de_or_other> <your_vm_bucket>
- Choice box: Select your image
- Select base os (ubuntu-20-04-amd64 for example)
- Click Create Image
Now you can provision a VM with your own VM image. Then please continue with creating a cluster.
Make sure you take the ImageID from your VM image. The ImageID can be determined using ibmcloud cli. In addition, the Kubernetes version must be set to match the image. In this example:
v1.23.4
Provision workload Cluster in IBM Cloud VPC
Now that we have a management cluster ready, you can create your workload cluster by following the steps below.
Note:
- The cluster will be deployed with cloud controller manager
- The template uses the experimental feature gate clusterresourceset which will create the necessary config map, secret and roles to run the cloud controller manager. Set
EXP_CLUSTER_RESOURCE_SETtotrue.- To deploy a cluster using ClusterClass, refer here. In addition to the above flags, set
CLUSTER_TOPOLOGYenvironment variable totrue.- The list of IBM Cloud VPC Regions and Zones can be found here.
-
Using clusterctl, render the yaml through templates and deploy the cluster
Note:
- The
IBMVPC_IMAGE_NAMEvalue below should reflect the name of the custom qcow2 image. - While working with unreleased versions like from main branch, instead of
--flavor=vpc-clusterclassuse--from ./templates/cluster-template-vpc-clusterclass.yaml.
IBMCLOUD_API_KEY="XXXXXXXXXXXXXXXXXX" \
IBMVPC_REGION=us-south \
IBMVPC_ZONE=us-south-1 \
IBMVPC_RESOURCEGROUP=4f15679623607b855b1a27a67f20e1c7 \
IBMVPC_NAME=ibm-vpc-0 \
IBMVPC_IMAGE_NAME=capibm-vpc-ubuntu-2004-kube-v1-26-2 \
IBMVPC_PROFILE=bx2-4x16 \
IBMVPC_SSHKEY_NAME=capi-vpc-key \
IBMACCOUNT_ID="ibm-accountid" \
BASE64_API_KEY=$(echo -n $IBMCLOUD_API_KEY | base64) \
clusterctl generate cluster ibm-vpc-0 --kubernetes-version v1.26.2 \
--target-namespace default \
--control-plane-machine-count=1 \
--worker-machine-count=2 | kubectl apply -f -
Output:
cluster.cluster.x-k8s.io/ibm-vpc-0 created
ibmvpccluster.infrastructure.cluster.x-k8s.io/ibm-vpc-0 created
kubeadmcontrolplane.controlplane.cluster.x-k8s.io/ibm-vpc-0-control-plane created
ibmvpcmachinetemplate.infrastructure.cluster.x-k8s.io/ibm-vpc-0-control-plane created
machinedeployment.cluster.x-k8s.io/ibm-vpc-0-md-0 created
ibmvpcmachinetemplate.infrastructure.cluster.x-k8s.io/ibm-vpc-0-md-0 created
kubeadmconfigtemplate.bootstrap.cluster.x-k8s.io/ibm-vpc-0-md-0 created
clusterresourceset.addons.cluster.x-k8s.io/crs-cloud-conf created
configmap/ibm-cfg created
secret/ibm-credential created
configmap/cloud-controller-manager-addon created
Note: Refer below for more detailed information on VPC variables.
- The
-
Check the state of the provisioned cluster and machine objects within the local management cluster
Clusters
~ kubectl get clusters
NAME         PHASE
ibm-vpc-0    Provisioned
Kubeadm Control Plane
~ kubectl get kubeadmcontrolplane
NAME                       INITIALIZED   API SERVER AVAILABLE   VERSION   REPLICAS   READY   UPDATED   UNAVAILABLE
ibm-vpc-0-control-plane    true          true                   v1.26.2   1          1       1
Machines
~ kubectl get machines ibm-vpc-0-control-plane-vzz47 ibmvpc://ibm-vpc-0/ibm-vpc-0-control-plane-rg6xv Running v1.26.2 ibm-vpc-0-md-0-5444cfcbcd-6gg5z ibmvpc://ibm-vpc-0/ibm-vpc-0-md-0-dbxb7 Running v1.26.2 ibm-vpc-0-md-0-5444cfcbcd-7kr9x ibmvpc://ibm-vpc-0/ibm-vpc-0-md-0-k7blr Running v1.26.2 -
Deploy Container Network Interface (CNI)
Example: calico
~ clusterctl get kubeconfig ibm-vpc-0 > ~/.kube/ibm-vpc-0 ~ export KUBECONFIG=~/.kube/ibm-vpc-0 ~ kubectl apply -f https://docs.projectcalico.org/v3.15/manifests/calico.yaml -
Check the state of the newly provisioned cluster within IBM Cloud
~ kubectl get nodes
NAME                             STATUS   ROLES    AGE   VERSION
ibm-vpc-0-control-plane-rg6xv    Ready    master   41h   v1.26.2
ibm-vpc-0-md-0-4dc5c             Ready    <none>   41h   v1.26.2
ibm-vpc-0-md-0-dbxb7             Ready    <none>   20h   v1.26.2
Change disk size for the boot volume
There are two following variables for controlling the volume size for the boot disk.
IBMVPC_CONTROLPLANE_BOOT_VOLUME_SIZEGIB: Size of the boot volume for the control plane nodes, default set to 20GiBIBMVPC_WORKER_BOOT_VOLUME_SIZEGIB: Size of the boot volume for the worker nodes, default set to 20GiB
Note: Default value is set to 20GiB because the images published for testing are of size 20GiB(default size in the image-builder scripts as well).
Deploy a VPC cluster using ClusterClass
IBMVPC_CLUSTER_CLASS_NAME=ibmvpc-clusterclass \
IBMCLOUD_API_KEY="XXXXXXXXXXXXXXXXXX" \
IBMVPC_REGION=us-south \
IBMVPC_ZONE=us-south-1 \
IBMVPC_RESOURCEGROUP=4f15679623607b855b1a27a67f20e1c7 \
IBMVPC_NAME=ibm-vpc-0 \
IBMVPC_IMAGE_NAME=capibm-vpc-ubuntu-2004-kube-v1-26-2 \
IBMVPC_PROFILE=bx2-4x16 \
IBMVPC_SSHKEY_NAME=capi-vpc-key \
IBMACCOUNT_ID="ibm-accountid" \
BASE64_API_KEY=$(echo -n $IBMCLOUD_API_KEY | base64) \
clusterctl generate cluster ibm-vpc-clusterclass --kubernetes-version v1.26.2 --target-namespace default --control-plane-machine-count=1 --worker-machine-count=2 --from=./templates/cluster-template-vpc-clusterclass.yaml | kubectl apply -f -
Note: Refer below for more detailed information on VPC variables.
- IBMVPC_CLUSTER_CLASS_NAME : Name of the cluster that user provides.
- IBMVPC_REGION
- IBMVPC_ZONE
- IBMVPC_RESOURCEGROUP : Go to Manage > Account > Account resources > Resource groups in the IBM Cloud console to get the resource group ID.
- IBMVPC_IMAGE_NAME : Name of the custom image. Refer here
- IBMVPC_PROFILE
- IBMVPC_SSHKEY_NAME : Name of the SSH Key. Refer here how to get the keys.
- IBMACCOUNT_ID : Go to the Manage > Account > Account settings page in the IBM Cloud console to view your account ID and type. The account ID is a 32 character, unique account identifier. Refer here
PowerVS Cluster
Contents
Prerequisites
- Install
kubectl(see here). Becausekustomizewas included intokubectland it’s used bycluster-api-provider-ibmcloudin generating yaml files, so version1.14.0+ofkubectlis required, see integrate kustomize into kubectl for more info. - You can use either VM, container or existing Kubernetes cluster act as the bootstrap cluster.
- Install a driver if you are using minikube. For Linux, we recommend kvm2. For MacOS, we recommend VirtualBox.
- An appropriately configured Go development environment
- Install
clusterctltool (see here) - Install
pvsadmtool (see here) - Install
capibmadmtool (see here)
PowerVS Prerequisites
Create an IBM Cloud account.
If you don’t already have one, you need a paid IBM Cloud account to create your Power Systems Virtual Server instance. To create an account, go to: cloud.ibm.com.
Create an IBM Cloud account API key
Please refer to the following documentation to create an API key.
Create Power Systems Virtual Server Service Instance
After you have an active IBM Cloud account, you can create a Power Systems Virtual Server service. To do so, perform the following steps:
Note: If you are deploying a PowerVS cluster with infrastructure creation, you can diretly proceed to the step 2 of cluster creation here as creating network resources and importing boot images is not required.
Create Network
A public network is required for your kubernetes cluster. Perform the following steps to create a public network for the Power Systems Virtual Server service instance created in the previous step.
-
Create Public Network
~ export IBMCLOUD_API_KEY=<API_KEY>
~ capibmadm powervs network create --name capi-test --service-instance-id 3229a94c-af54-4212-bf60-6202b6fd0a07 --zone osa21
Output:
Creating PowerVS network service-instance-id="3229a94c-af54-4212-bf60-6202b6fd0a07" zone="osa21"
Successfully created a network networkID="3ee5a1ca-19b4-48c7-a89d-44babdd18703"
Import the machine boot image:
$ export IBMCLOUD_API_KEY=<API_KEY>
$ capibmadm powervs image import --service-instance-id <SERVICE_INSTANCE_ID>  --zone <ZONE> --bucket-region <BUCKET_REGION> --object <OBJECT>  --name <POWERVS_IMAGE_NAME> --bucket <BUCKETNAME> --public-bucket
e.g:
$ capibmadm powervs image import --service-instance-id 3229a94c-af54-4212-bf60-6202b6fd0a07 --zone osa21 --bucket-region jp-tok --object RHEL9.0-image.ova.gz --name powervs_image --bucket ocp-development-public-bucket --public-bucket
For more information about the images can be found at machine-images section
Provision workload cluster in IBM Cloud PowerVS
Note: A PowerVS cluster can be deployed with different customisations. Pick one of the following templates as per your need and fulfill the prerequisites before proceeding with cluster creation.
Now that we have a management cluster ready, you can create your workload cluster by following the steps below.
-
Create PowerVS network port
~ export IBMCLOUD_API_KEY=<API_KEY>
~ capibmadm powervs port create --network capi-test --description capi-test-port --service-instance-id 3229a94c-af54-4212-bf60-6202b6fd0a07 --zone osa21
Output:
Creating Port  Network ID/Name="capi-test" IP Address="" Description="capi-test-port" service-instance-id="3229a94c-af54-4212-bf60-6202b6fd0a07" zone="osa21"
Successfully created a port portID="c7e7b6e0-0b0d-4a11-a90b-6ea293deb5ac"
DESCRIPTION      EXTERNAL IP   IP ADDRESS      MAC ADDRESS         PORT ID                                STATUS
capi-test-port                 192.168.167.6   fa:16:3e:89:c8:80   c7e7b6e0-0b0d-4a11-a90b-6ea293deb5ac   DOWN
~ capibmadm powervs port list --network capi-test --service-instance-id 3229a94c-af54-4212-bf60-6202b6fd0a07 --zone osa21Output:
Listing PowerVS ports service-instance-id="3229a94c-af54-4212-bf60-6202b6fd0a07" network="capi-test" DESCRIPTION EXTERNAL IP IP ADDRESS MAC ADDRESS PORT ID STATUS capi-test-port 163.68.65.6 192.168.167.6 fa:16:3e:89:c8:80 c7e7b6e0-0b0d-4a11-a90b-6ea293deb5ac DOWN -
Use clusterctl to render the yaml through templates and deploy the cluster. Replace the following snippet with the template of your choice.
Note:
- Set
EXP_CLUSTER_RESOURCE_SETtotrueas the cluster will be deployed with external cloud provider which will create the resources to run the cloud controller manager. - The
IBMPOWERVS_IMAGE_NAMEvalue below should reflect the name of the custom image and thekubernetes-versionvalue below should reflect the kubernetes version of the custom image. - While working with unreleased versions like from main branch, instead of
--flavor=powervsuse--from=./templates/cluster-template-powervs.yaml. - Refer detailed information on PowerVS variables here
IBMPOWERVS_SSHKEY_NAME="my-pub-key" \
IBMPOWERVS_VIP="192.168.167.6" \
IBMPOWERVS_VIP_EXTERNAL="163.68.65.6" \
IBMPOWERVS_VIP_CIDR="29" \
IBMPOWERVS_IMAGE_NAME="capibm-powervs-centos-streams8-1-26-2" \
IBMPOWERVS_SERVICE_INSTANCE_ID="3229a94c-af54-4212-bf60-6202b6fd0a07" \
IBMPOWERVS_NETWORK_NAME="capi-test" \
IBMACCOUNT_ID="ibm-accountid" \
IBMPOWERVS_REGION="osa" \
IBMPOWERVS_ZONE="osa21" \
BASE64_API_KEY=$(echo -n $IBMCLOUD_API_KEY | base64) \
clusterctl generate cluster ibm-powervs-1 --kubernetes-version v1.26.2 \
--target-namespace default \
--control-plane-machine-count=3 \
--worker-machine-count=1 \
--flavor=powervs | kubectl apply -f -
Output:
cluster.cluster.x-k8s.io/ibm-powervs-1 created
ibmpowervscluster.infrastructure.cluster.x-k8s.io/ibm-powervs-1 created
kubeadmcontrolplane.controlplane.cluster.x-k8s.io/ibm-powervs-1-control-plane created
ibmpowervsmachinetemplate.infrastructure.cluster.x-k8s.io/ibm-powervs-1-control-plane created
machinedeployment.cluster.x-k8s.io/ibm-powervs-1-md-0 created
ibmpowervsmachinetemplate.infrastructure.cluster.x-k8s.io/ibm-powervs-1-md-0 created
kubeadmconfigtemplate.bootstrap.cluster.x-k8s.io/ibm-powervs-1-md-0 created
Additional parameters for modifying PowerVS Control-Plane spec
IBMPOWERVS_CONTROL_PLANE_MEMORY
IBMPOWERVS_CONTROL_PLANE_PROCESSORS
IBMPOWERVS_CONTROL_PLANE_SYSTYPE
IBMPOWERVS_CONTROL_PLANE_PROCTYPE
Additional parameters for modifying PowerVS Compute node spec
IBMPOWERVS_COMPUTE_MEMORY
IBMPOWERVS_COMPUTE_PROCESSORS
IBMPOWERVS_COMPUTE_SYSTYPE
IBMPOWERVS_COMPUTE_PROCTYPE
Additional parameters for modifying PowerVS Cluster API server port
API_SERVER_PORT - Set
-
Check the state of the provisioned cluster and machine objects within the local management cluster
Clusters
~ kubectl get clusters
NAME         PHASE
ibm-powervs-1    Provisioned
Kubeadm Control Plane
~ kubectl get kubeadmcontrolplane
NAME                       INITIALIZED   API SERVER AVAILABLE   VERSION   REPLICAS   READY   UPDATED   UNAVAILABLE
ibm-powervs-1-control-plane    true          true                   v1.26.2   1          1       1
Machines
~ kubectl get machines ibm-powervs-1-control-plane-vzz47 ibmpowervs://ibm-powervs-1/ibm-powervs-1-control-plane-rg6xv Running v1.26.2 ibm-powervs-1-md-0-5444cfcbcd-6gg5z ibmpowervs://ibm-powervs-1/ibm-powervs-1-md-0-dbxb7 Running v1.26.2 ibm-powervs-1-md-0-5444cfcbcd-7kr9x ibmpowervs://ibm-powervs-1/ibm-powervs-1-md-0-k7blr Running v1.26.2 -
Deploy Container Network Interface (CNI)
Example: calico
~ clusterctl get kubeconfig ibm-powervs-1 > ~/.kube/ibm-powervs-1 ~ export KUBECONFIG=~/.kube/ibm-powervs-1 ~ kubectl apply -f https://docs.projectcalico.org/v3.15/manifests/calico.yaml -
Check the state of the newly provisioned cluster within IBM Cloud
~ kubectl get nodes
NAME                             STATUS   ROLES    AGE   VERSION
ibm-powervs-1-control-plane-rg6xv    Ready    master   41h   v1.26.2
ibm-powervs-1-md-0-4dc5c             Ready    <none>   41h   v1.26.2
ibm-powervs-1-md-0-dbxb7             Ready    <none>   20h   v1.26.2
Deploy a PowerVS cluster with infrastructure creation
Prerequisites:
- Already existing infrasturcture resources can be used for cluster creation by setting either the ID or name in spec. If neither are specified, the cluster name will be used for constructing the resource name. For example, if cluster name is
capi-powervs, PowerVS workspace will be created with namecapi-powervs-serviceInstance.
Note: While working with unreleased versions like from main branch, instead of --flavor=powervs-create-infra use --from=./templates/cluster-template-powervs-create-infra.yaml.
  IBMCLOUD_API_KEY=XXXXXXXXXXXX \
  IBMPOWERVS_SSHKEY_NAME="my-ssh-key" \
  COS_BUCKET_REGION="us-south" \
  COS_BUCKET_NAME="power-oss-bucket" \
  COS_OBJECT_NAME=capibm-powervs-centos-streams8-1-28-4-1707287079.ova.gz \
  IBMACCOUNT_ID="<account_id>" \
  IBMPOWERVS_REGION="wdc" \
  IBMPOWERVS_ZONE="wdc06" \
  IBMVPC_REGION="us-east" \
  IBM_RESOURCE_GROUP="ibm-resource-group" \
  BASE64_API_KEY=$(echo -n $IBMCLOUD_API_KEY | base64) \
  clusterctl generate cluster capi-powervs --kubernetes-version v1.28.4 \
  --target-namespace default \
  --control-plane-machine-count=3 \
  --worker-machine-count=1 \
  --flavor=powervs-create-infra | kubectl apply -f -
Deploy a PowerVS cluster with cluster class
Prerequisites:
- To deploy a cluster using ClusterClass, set
CLUSTER_TOPOLOGYenvironment variable totrue.
Note: While working with unreleased versions like from main branch, instead of --flavor=powervs-clusterclass use --from=./templates/cluster-template-powervs-clusterclass.yaml.
IBMPOWERVS_CLUSTER_CLASS_NAME="powervs-cc" \
IBMPOWERVS_SSHKEY_NAME="my-pub-key" \
IBMPOWERVS_VIP="192.168.167.6" \
IBMPOWERVS_VIP_EXTERNAL="163.68.65.6" \
IBMPOWERVS_VIP_CIDR="29" \
IBMPOWERVS_IMAGE_NAME="capibm-powervs-centos-streams8-1-26-2" \
IBMPOWERVS_SERVICE_INSTANCE_ID="3229a94c-af54-4212-bf60-6202b6fd0a07" \
IBMPOWERVS_NETWORK_NAME="capi-test" \
IBMACCOUNT_ID="ibm-accountid" \
IBMPOWERVS_REGION="osa" \
IBMPOWERVS_ZONE="osa21" \
BASE64_API_KEY=$(echo -n $IBMCLOUD_API_KEY | base64) \
clusterctl generate cluster ibm-powervs-1 --kubernetes-version v1.26.2 \
--target-namespace default \
--control-plane-machine-count=3 \
--worker-machine-count=1 \
--flavor=powervs-clusterclass | kubectl apply -f -
Note: Refer below for more detailed information on PowerVS variables.
- IBMPOWERVS_CLUSTER_CLASS_NAME : Name of the cluster that user provides.
- IBMPOWERVS_SSHKEY_NAME : Name of the SSH Key. Refer here how to get the keys.
- IBMPOWERVS_VIP, IBMPOWERVS_VIP_EXTERNAL and IBMPOWERVS_VIP_CIDR : Once we have created the network and port, the values will be available on listing the ports. Refer here
- IBMPOWERVS_IMAGE_NAME : Name of the custom image. Refer here to get image details.
- IBMPOWERVS_SERVICE_INSTANCE_ID : ID of the PowerVS workspace. Refer here
- IBMACCOUNT_ID : Go to the Account settings page in the IBM Cloud console to view your account ID and type. The account ID is a 32 character, unique account identifier.Refer here
- IBMPOWERVS_NETWORK_NAME : The name of the network. Refer here how to get the network details.
- IBMPOWERVS_REGION
- IBMPOWERVS_ZONE
- IBM_RESOURCE_GROUP : Go to Manage > Account > Account resources > Resource groups in the IBM Cloud console to get the resource group Name.
- COS_BUCKET_REGION, COS_BUCKET_NAME and COS_OBJECT_NAME : Refer here to get the COS details.
Using Autoscaler to scale machines from 0 machine
The autoscaler project supports cluster-api. With this enhancement now the user can use cluster-api feature to scaling from 0 machine.
Settinng up the workload cluster
While creating a workload cluster, We need to set the below annotations to machinedeployment inorder to enable the autoscaling, This is one of the prerequisites for autoscaler.
apiVersion: cluster.x-k8s.io/v1beta1
kind: MachineDeployment
metadata:
  name: "${CLUSTER_NAME}-md-0"
  annotations:
    cluster.x-k8s.io/cluster-api-autoscaler-node-group-max-size: "5"
    cluster.x-k8s.io/cluster-api-autoscaler-node-group-min-size: "0"
Setting up the cluster-autoscaler
- Clone the autoscaler repository
git clone https://github.com/kubernetes/autoscaler.git
- Build the autoscaler binary
cd cluster-autoscaler
go build .
- Start the autoscaler
./cluster-autoscaler \
--cloud-provider=clusterapi \
--v=2 \
--namespace=default \
--max-nodes-total=30 \
--scale-down-delay-after-add=10s \
--scale-down-delay-after-delete=10s \
--scale-down-delay-after-failure=10s \
--scale-down-unneeded-time=5m \
--max-node-provision-time=30m \
--balance-similar-node-groups \
--expander=random \
--kubeconfig=<workload_cluster_kubeconfig> \
--cloud-config=<management_cluster_kubeconfig>
Note:
- Autoscaler can be run in different ways, the possible ways are described here.
- Autoscaler supports various command line flags and more details about it can be found here.
Use case of cluster-autoscaler
- Create a workload cluster with 0 worker machines
- Create a sample workload
apiVersion: apps/v1
kind: Deployment
metadata:
  labels:
    app: busybox
  name: busybox-deployment
  namespace: default
spec:
  replicas: 1
  selector:
    matchLabels:
      app: busybox
  template:
    metadata:
      labels:
        app: busybox
    spec:
      containers:
        - command:
            - sh
            - -c
            - echo Container 1 is Running ; sleep 3600
          image: busybox
          imagePullPolicy: IfNotPresent
          name: busybox
          resources:
            requests:
              cpu: "0.2"
              memory: 3G
- Scale the deployment to create addition pods
kubectl scale --replicas=2 deployment/busybox-deployment
- Obeserve the status of new pods
kubectl get pods
NAME                                  READY   STATUS    RESTARTS   AGE
busybox-deployment-7c87788568-qhqdb   1/1     Running   0          48s
busybox-deployment-7c87788568-t26bb   0/1     Pending   0          5s
- On the management cluster verify that the new machine creation is being triggered by autoscaler
NAME                                        CLUSTER               NODENAME                                  PROVIDERID                                                                                      PHASE          AGE     VERSION
ibm-powervs-control-plane-smvf7     ibm-powervs   ibm-powervs-control-plane-pgwmz   ibmpowervs://osa/osa21/3229a-af54-4212-bf60-6202b6fd0a07/809cd0f2-7502-4112-bf44-84d178020d8a   Running        82m     v1.24.2
ibm-powervs-md-0-6b4d67ccf4-npdbm   ibm-powervs   ibm-powervs-md-0-qch8f            ibmpowervs://osa/osa21/3229a-af54-4212-bf60-6202b6fd0a07/50f841e5-f58c-4569-894d-b40ba0d2696e   Running        76m     v1.24.2
ibm-powervs-md-0-6b4d67ccf4-v7xv9   ibm-powervs                                                                                                                                             Provisioning   3m19s   v1.24.2
- After sometime verify that the new node being added to the cluster and pod is in running state
kubectl get nodes
NAME                                      STATUS   ROLES           AGE   VERSION
ibm-powervs-control-plane-pgwmz   Ready    control-plane   92m   v1.24.2
ibm-powervs-md-0-n8c6d            Ready    <none>          42s   v1.24.2
ibm-powervs-md-0-qch8f            Ready    <none>          85m   v1.24.2

kubectl get pods
NAME                                  READY   STATUS    RESTARTS   AGE
busybox-deployment-7c87788568-qhqdb   1/1     Running   0          19m
busybox-deployment-7c87788568-t26bb   1/1     Running   0          18m
- Delete the deployment to observe the scale down of nodes by autoscaler
kubectl delete deployment/busybox-deployment

kubectl get nodes
NAME                                      STATUS   ROLES           AGE    VERSION
ibm-powervs-control-plane-pgwmz   Ready    control-plane   105m   v1.24.2
ibm-powervs-md-0-qch8f            Ready    <none>          98m    v1.24.2
capibmadm CLI
Kubernetes Cluster API Provider IBM Cloud Management Utility
Install capibmadm
Install capibmadm binary with curl on Linux
If you are unsure you can determine your computers architecture by running uname -a
Download for AMD64:
curl -L https://github.com/kubernetes-sigs/cluster-api-provider-ibmcloud/releases/download/v0.7.0/capibmadm-linux-amd64 -o capibmadm
Download for ARM64:
curl -L https://github.com/kubernetes-sigs/cluster-api-provider-ibmcloud/releases/download/v0.7.0/capibmadm-linux-arm64 -o capibmadm
Download for PPC64LE:
curl -L https://github.com/kubernetes-sigs/cluster-api-provider-ibmcloud/releases/download/v0.7.0/capibmadm-linux-ppc64le -o capibmadm
Make the capibmadm binary executable.
chmod +x ./capibmadm
Move the binary in to your PATH.
sudo mv ./capibmadm /usr/local/bin/capibmadm
Test to ensure the version you installed is up-to-date:
capibmadm version -o short
Install capibmadm binary with curl on macOS
If you are unsure you can determine your computers architecture by running uname -a
Download for AMD64:
curl -L https://github.com/kubernetes-sigs/cluster-api-provider-ibmcloud/releases/download/v0.7.0/capibmadm-darwin-amd64 -o capibmadm
Download for M1 CPU (“Apple Silicon”) / ARM64:
curl -L https://github.com/kubernetes-sigs/cluster-api-provider-ibmcloud/releases/download/v0.7.0/capibmadm-darwin-arm64 -o capibmadm
Make the capibmadm binary executable.
chmod +x ./capibmadm
Move the binary in to your PATH.
sudo mv ./capibmadm /usr/local/bin/capibmadm
Test to ensure the version you installed is up-to-date:
capibmadm version -o short
Install capibmadm binary with curl on Windows using PowerShell
Go to the working directory where you want capibmadm downloaded.
Download the latest release on AMD64; on Windows, type:
curl.exe -L https://github.com/kubernetes-sigs/cluster-api-provider-ibmcloud/releases/download/v0.7.0/capibmadm-windows-amd64.exe -o capibmadm.exe
Append or prepend the path of that directory to the PATH environment variable.
Download the latest release on ARM64; on Windows, type:
curl.exe -L https://github.com/kubernetes-sigs/cluster-api-provider-ibmcloud/releases/download/v0.7.0/capibmadm-windows-arm64.exe -o capibmadm.exe
Append or prepend the path of that directory to the PATH environment variable.
Test to ensure the version you installed is up-to-date:
capibmadm.exe version -o short
1. PowerVS commands
2. VPC commands
capibmadm powervs <commands>
1. PowerVS commands
PowerVS Image Commands
1. capibmadm powervs image import
Usage:
Import PowerVS image.
Environmental Variable:
IBMCLOUD_API_KEY: IBM Cloud API key.
Arguments:
–service-instance-id: PowerVS service instance id.
–bucket: Cloud Object Storage bucket name.
–bucket-region: Cloud Object Storage bucket location.
–object: Cloud Object Storage object name.
–accesskey: Cloud Object Storage HMAC access key.
–secretkey: Cloud Object Storage HMAC secret key.
–name: Name to PowerVS imported image.
–public-bucket: Cloud Object Storage public bucket.
–watch-timeout: watch timeout.
–pvs-storagetype: PowerVS Storage type, accepted values are [tier1, tier3]..
Example:
export IBMCLOUD_API_KEY=<api-key>
# import image using default storage type (service credential will be autogenerated):
capibmadm powervs image import --service-instance-id <service-instance-id> -b <bucketname> --object rhel-83-10032020.ova.gz --name <imagename> -r <region> --zone <zone>

# import image using default storage type with specifying the accesskey and secretkey explicitly:
capibmadm powervs image import --service-instance-id <service-instance-id> -b <bucketname> --object rhel-83-10032020.ova.gz --name <imagename> -r <region> --zone <zone> --accesskey <accesskey> --secretkey <secretkey>

# with user provided storage type:
capibmadm powervs image import --service-instance-id <service-instance-id> -b <bucketname> --pvs-storagetype <storagetype> --object rhel-83-10032020.ova.gz --name <imagename> -r <region> --zone <zone>

#import image from a public IBM Cloud Storage bucket:
capibmadm powervs image import --service-instance-id <service-instance-id> -b <bucketname>  --object rhel-83-10032020.ova.gz --name <imagename> -r <region> --public-bucket --zone <zone>
2. capibmadm powervs image list
Usage:
List PowerVS images.
Environmental Variable:
IBMCLOUD_API_KEY: IBM Cloud API key.
Arguments:
–service-instance-id: PowerVS service instance id.
–zone: PowerVS service instance zone.
Example:
export IBMCLOUD_API_KEY=<api-key>
capibmadm powervs image list --service-instance-id <service-instance-id> --zone <zone>
PowerVS Network Commands
1. capibmadm powervs network create
Usage:
Create PowerVS network.
Environmental Variable:
IBMCLOUD_API_KEY: IBM Cloud API key.
Arguments:
–service-instance-id: PowerVS service instance id.
–cidr: The network CIDR. Required for private network type.
–name: The name of the network.
–public: Public (pub-vlan) network type (default true)
–private: Private (vlan) network type (default false)
–gateway: The gateway ip address.
–dns-servers: Comma separated list of DNS Servers to use for this network, Defaults to 8.8.8.8, 9.9.9.9.
–ip-ranges: Comma separated IP Address Ranges.
–jumbo: Enable MTU Jumbo Network.
Example:
export IBMCLOUD_API_KEY=<api-key>
# Public network:
capibmadm powervs network create --public --service-instance-id <service-instance-id> --zone <zone>
# Private network:
capibmadm powervs network create --private --cidr <cidr> --service-instance-id <service-instance-id> --zone <zone>
# Private network with ip address ranges:
capibmadm powervs network create --private --cidr <cidr> --ip-ranges <start-ip>-<end-ip>,<start-ip>-<end-ip> --service-instance-id <service-instance-id> --zone <zone>
2. capibmadm powervs network delete
Usage:
Delete PowerVS network.
Environmental Variable:
IBMCLOUD_API_KEY: IBM Cloud API key.
Arguments:
–service-instance-id: PowerVS service instance id.
–zone: PowerVS service instance zone.
–network: Network ID or Name.
Example:
export IBMCLOUD_API_KEY=<api-key>
capibmadm powervs network delete --network <network-name/network-id> --service-instance-id <service-instance-id> --zone <zone>
3. capibmadm powervs network list
Usage:
List PowerVS networks.
Environmental Variable:
IBMCLOUD_API_KEY: IBM Cloud API key.
Arguments:
–service-instance-id: PowerVS service instance id.
–zone: PowerVS service instance zone.
Example:
export IBMCLOUD_API_KEY=<api-key>
capibmadm powervs network list --service-instance-id <service-instance-id> --zone <zone>
PowerVS Network Commands
1. capibmadm powervs port create
Usage:
Create PowerVS network port.
Environmental Variable:
IBMCLOUD_API_KEY: IBM Cloud API key.
Arguments:
–service-instance-id: PowerVS service instance id.
–zone: PowerVS service instance zone.
–network: Network ID/ Network Name.
–description: Description of the port.
–ip-address: The requested IP address of this port
Example:
export IBMCLOUD_API_KEY=<api-key>
capibmadm powervs port create --network <netword-id/network-name> --description <description> --service-instance-id <service-instance-id> --zone <zone>
2. capibmadm powervs port delete
Usage:
Delete PowerVS network port.
Environmental Variable:
IBMCLOUD_API_KEY: IBM Cloud API key.
Arguments:
–service-instance-id: PowerVS service instance id.
–zone: PowerVS zone.
–port-id: ID of network port.
–network: Network ID or Name.
Example:
export IBMCLOUD_API_KEY=<api-key>
capibmadm powervs port delete --port-id <port-id> --network <network-name/network-id> --service-instance-id <service-instance-id> --zone <zone>
3. capibmadm powervs port list
Usage:
List PowerVS ports.
Environmental Variable:
IBMCLOUD_API_KEY: IBM Cloud API key.
Arguments:
–service-instance-id: PowerVS service instance id.
–zone: PowerVS zone.
–network: Network ID or Name.
Example:
export IBMCLOUD_API_KEY=<api-key>
capibmadm powervs port list --service-instance-id <service-instance-id> --zone <zone> --network <network-name/network-id>
PowerVS SSH key Commands
1. capibmadm powervs key create
Usage:
Create an SSH key in the PowerVS environment.
Environmental Variable:
IBMCLOUD_API_KEY: IBM Cloud API key.
Arguments:
–service-instance-id: PowerVS service instance id.
–zone: PowerVS zone.
–name: The name of the SSH key.
Either of the arguments need to be provided:
–key: SSH RSA key string within a double quotation marks. For example, “ssh-rsa AAA… “.
–key-path: The absolute path to the SSH key file.
Example:
export IBMCLOUD_API_KEY=<api-key>

# Using SSH key
capibmadm powervs key create --name <key-name> --key "<ssh-key>" --service-instance-id <service-instance-id> --zone <zone>

# Using file-path to SSH key
capibmadm powervs key create --name <key-name> --key-path <path/to/ssh/key> --service-instance-id <service-instance-id> --zone <zone>
2. capibmadm powervs key delete
Usage:
Delete an SSH key in the PowerVS environment.
Environmental Variable:
IBMCLOUD_API_KEY: IBM Cloud API key.
Arguments:
–service-instance-id: PowerVS service instance id.
–zone: PowerVS zone.
–name: The name of the SSH key.
Example:
export IBMCLOUD_API_KEY=<api-key>
capibmadm powervs key delete --name <key-name> --service-instance-id <service-instance-id> --zone <zone>
3. capibmadm powervs key list
Usage:
List all SSH Keys in the PowerVS environment.
Environmental Variable:
IBMCLOUD_API_KEY: IBM Cloud API key.
Arguments:
–service-instance-id: PowerVS service instance id.
–zone: PowerVS zone.
Example:
export IBMCLOUD_API_KEY=<api-key>
capibmadm powervs key list --service-instance-id <service-instance-id> --zone <zone>
capibmadm vpc <commands>
1. VPC commands
VPC image Commands
1. capibmadm vpc image list
Usage:
List images in given VPC region.
Environmental Variable:
IBMCLOUD_API_KEY: IBM Cloud API key.
Arguments:
–region: VPC region.
–resource-group-name: IBM Cloud resource group name.
Example:
export IBMCLOUD_API_KEY=<api-key>
capibmadm vpc image list --region <region> --resource-group-name <resource-group>
VPC SSH key Commands
1. capibmadm vpc key list
Usage:
List SSH keys in given VPC region.
Environmental Variable:
IBMCLOUD_API_KEY: IBM Cloud API key.
Arguments:
–region: VPC region.
–resource-group-name: IBM Cloud resource group name.
Example:
export IBMCLOUD_API_KEY=<api-key>
capibmadm vpc key list --region <region> --resource-group-name <resource-group>
2. capibmadm vpc key create
Usage:
Create a key in the VPC environment.
Environmental Variable:
IBMCLOUD_API_KEY: IBM Cloud API key.
Arguments:
–name: The name of the key.
–resource-group-name: VPC resource group name.
–region: VPC region.
Either of the arguments need to be provided:
–public-key: Public key string within a double quotation marks. For example, “ssh-rsa AAA… “.
–key-path: The absolute path to the SSH key file.
Example:
export IBMCLOUD_API_KEY=<api-key>

capibmadm vpc key create --name <key-name> --region <region> --public-key "<public-key-string>"

capibmadm vpc key create --name <key-name> --region <region> --key-path <path/to/ssh/key>
3. capibmadm vpc key delete
Usage:
Delete a key in the VPC environment.
Environmental Variable:
IBMCLOUD_API_KEY: IBM Cloud API key.
Arguments:
–name: The name of the key.
–region: VPC region.
Example:
export IBMCLOUD_API_KEY=<api-key>
capibmadm vpc key delete --name <key-name> --region <region>
Developer Guide
- Rapid iterative development with Tilt
- Guide for API conversions
- Release Process
- Release Support Guidelines
- How to build the machine boot images
- Modules and tools dependencies
- E2E testing
Rapid iterative development with Tilt
Overview
This document describes how to use kind and Tilt for a simplified workflow that offers easy deployments and rapid iterative builds.
Prerequisites
- Container Runtime Interface
- kind v0.9 or newer (other clusters can be
used if
preload_images_for_kindis set to false) - kustomize
- Tilt v0.30.8 or newer
- envsubst or similar to handle clusterctl var replacement
- Clone the Cluster API repository locally
- Clone the cluster-api-provider-ibmcloud repository you want to deploy locally as well
If the user prefers to have Podman as the CRI, then follow the steps listed below:
- Emulate Docker CLI with Podman: Instructions can be found here
- On
Mac OSmigrate from Docker to Podman: Instructions can be found here.
1. Create Podman machine
$ podman machine init
$ podman machine start
2. Configure podman to use local registry
$ podman machine ssh
$ sudo vi /etc/containers/registries.conf

## at the end of the file add below content

[[registry]]
location = "localhost:5001"
insecure = true
3. Restart Podman machine
podman machine stop
podman machine start
Create a kind cluster
First, make sure you have a kind cluster and that your KUBECONFIG is set up correctly.
Note: Execute the following from the
cluster-api-provider-ibmcloudrespository.
make kind-cluster
This local cluster will host the cluster-api controllers, which makes it the management cluster. The management cluster can be used to create and manage workload clusters on IBM Cloud.
Create a tilt-settings.yaml file
Next, create a tilt-settings.yaml file and place it in your local copy of cluster-api. Here is an example:
Example tilt-settings.yaml for CAPI-IBM clusters:
Make sure to set a valid API key for the field IBMCLOUD_API_KEY.
default_registry: "localhost:5001"
provider_repos:
- ../cluster-api-provider-ibmcloud
enable_providers:
- ibmcloud
- kubeadm-bootstrap
- kubeadm-control-plane
kustomize_substitutions:
  IBMCLOUD_API_KEY: "XXXXXXXXXXXXXXXXXX"
  EXP_CLUSTER_RESOURCE_SET: "true"
Add following extra_args to log PowerVS REST API Requests/Responses
extra_args:
  ibmcloud:
    - '-v=5'
Different flavors of deploying workload clusters using CAPIBM.
Note: Currently, both ClusterClass and ClusterResourceset are experimental features. By default, the workload cluster is deployed using the external Cloud Controller Manager (CCM).
1. Configuration to deploy workload cluster from ClusterClass template
To deploy workload cluster with clusterclass-template, enable the feature gates EXP_CLUSTER_RESOURCE_SET and CLUSTER_TOPOLOGY to true under kustomize_substitutions.
default_registry: "localhost:5001"
provider_repos:
- ../cluster-api-provider-ibmcloud
enable_providers:
- ibmcloud
- kubeadm-bootstrap
- kubeadm-control-plane
kustomize_substitutions:
  IBMCLOUD_API_KEY: "XXXXXXXXXXXXXXXXXX"
  EXP_CLUSTER_RESOURCE_SET: "true"
  CLUSTER_TOPOLOGY: "true"
2. Configuration to deploy workload cluster with Custom Service Endpoint
To deploy workload cluster with Custom Service Endpoint, Set SERVICE_ENDPOINT environmental variable in semi-colon separated format: ${ServiceRegion}:${ServiceID1}=${URL1},${ServiceID2}=${URL2...}
default_registry: "localhost:5001"
provider_repos:
- ../cluster-api-provider-ibmcloud
enable_providers:
- ibmcloud
- kubeadm-bootstrap
- kubeadm-control-plane
kustomize_substitutions:
  IBMCLOUD_API_KEY: "XXXXXXXXXXXXXXXXXX"
  SERVICE_ENDPOINT: "us-south:vpc=https://us-south-stage01.iaasdev.cloud.ibm.com,powervs=https://dal.power-iaas.test.cloud.ibm.com,rc=https://resource-controller.test.cloud.ibm.com"
  IBMCLOUD_AUTH_URL: "https://iam.test.cloud.ibm.com"
3. Configuration to use observability tools
- cluster-api provides support for deploying observability tools, More information about it is available in cluster-api book.
default_registry: "localhost:5001"
deploy_observability:
   - promtail
   - loki
   - grafana
   - prometheus
provider_repos:
  - ../cluster-api-provider-ibmcloud
enable_providers:
  - ibmcloud
  - kubeadm-bootstrap
  - kubeadm-control-plane
kustomize_substitutions:
  IBMCLOUD_API_KEY: "XXXXXXXXXXXXXXXXXX"
  EXP_CLUSTER_RESOURCE_SET: "true"
extra_args:
   core:
      - "--logging-format=json"
      - "--v=5"
   kubeadm-bootstrap:
      - "--v=5"
      - "--logging-format=json"
   kubeadm-control-plane:
      - "--v=5"
      - "--logging-format=json"
   ibmcloud:
      - "--v=5"
      - "--logging-format=json"
NOTE: For information about all the fields that can be used in the tilt-settings.yaml file, check them here.
Run Tilt
To launch your development environment, run:
tilt up
Kind cluster becomes a management cluster after this point, check the pods running on the kind cluster by running kubectl get pods -A.
Create workload clusters
To provision your workload cluster, check the Creating a cluster section for VPC and PowerVS.
After deploying it, check the tilt logs and wait for the clusters to be created.
Clean up
Before deleting the kind cluster, make sure you delete all the workload clusters.
kubectl delete cluster <clustername>
tilt up (ctrl-c)
kind delete cluster
Guide for API conversions
Introduction
The purpose of this document is to help/assist contributors with future API conversions using conversion-gen tool.
Prerequisites
- Create a new API version.
kubebuilder create api --group <group> --version <version> --kind <kind>
- Copy over existing types, and make the required changes.
- Mark a storage version, add marker
+kubebuilder:storageversionto concerned version package.
NOTE: Refer for more detailed information about prerequisites.
Conversion flow
- In each “spoke” version package, add marker
+k8s:conversion-gendirective pointing to the “hub” version package. It must be indoc.go. Refer - In “hub” version package, create
doc.gofile without any marker. Refer - In “spoke” version package, add a var
localSchemeBuilder = &SchemeBuilder.SchemeBuilderingroupversion_info.goso the auto-generated code would compile. Refer - In “hub” version package, create a
conversion.goto implement the “hub” methods. Refer - Run target
make generate-go-conversions-core, this will generatezz_generated.conversion.goin the spoke version package. - In “spoke” version package, update
{kind}_conversion.goto implement Convertible for each type. Whenconversion-genstops generating methods because of incompatibilities or we need to override the behavior, we stick them in this source file. Our “spoke” versions need to implement the Convertible interface. Namely, they’ll need ConvertTo and ConvertFrom methods to convert to/from the hub version. Refer
References
Release Process
Alpha/Beta releases
- Create a tag and push
git clone git@github.com:kubernetes-sigs/cluster-api-provider-ibmcloud.git git tag -s -m "v0.2.0-alpha.3" v0.2.0-alpha.3 git push origin v0.2.0-alpha.3 - Wait for the google cloud build to be finished
- Prepare release notes
- Create a draft release with release notes for the tag
- Tick the prerelease checkbox
- Download the artifacts once cloud build is finished
gsutil -m cp \ "gs://artifacts.k8s-staging-capi-ibmcloud.appspot.com/components/v0.2.0-alpha.3/cluster-template-powervs.yaml" \ "gs://artifacts.k8s-staging-capi-ibmcloud.appspot.com/components/v0.2.0-alpha.3/cluster-template.yaml" \ "gs://artifacts.k8s-staging-capi-ibmcloud.appspot.com/components/v0.2.0-alpha.3/infrastructure-components.yaml" \ "gs://artifacts.k8s-staging-capi-ibmcloud.appspot.com/components/v0.2.0-alpha.3/metadata.yaml" \ . - Upload the downloaded artifacts into the release asset
- Publish the drafted release
Note: In the above instructions,
v0.2.0-alpha.3is the version/tag is being released
GA Releases
- Create a tag and push
git clone git@github.com:kubernetes-sigs/cluster-api-provider-ibmcloud.git git tag -s -m "v0.1.0" v0.1.0 git push origin v0.1.0 - Wait for the google cloud build to be finished
- Prepare release notes
- Create a draft release with release notes for the tag
- Perform the image promotion process:
- Clone and pull down the latest from kubernetes/k8s.io
- Create a new branch in your fork of
kubernetes/k8s.io. - The staging repository is here.
- Once image is present in the above staging repository, find the sha256 tag for the image by following instructions
$ manifest-tool inspect --raw gcr.io/k8s-staging-capi-ibmcloud/cluster-api-ibmcloud-controller:v0.1.0 | jq '.[0].Digest' "sha256:6c92a6a337ca5152eda855ac27c9e4ca1f30bba0aa4de5c3a0b937270ead4363"- In your
kubernetes/k8s.iobranch editk8s.gcr.io/images/k8s-staging-capi-ibmcloud/images.yamland add an entry for the version using the sha256 value got from the above command. For example:"sha256:6c92a6a337ca5152eda855ac27c9e4ca1f30bba0aa4de5c3a0b937270ead4363": ["v0.1.0"] - You can use this PR as example
- Wait for the PR to be approved and merged
- Run
make releasecommand - Copy the content from
outdirectory to release asset - Publish the drafted release
Note: In the above instructions,
v0.1.0is the version/tag is being released
Prepare release notes
-
If you don’t have a GitHub token, create one by going to your GitHub settings, in Personal access tokens. Make sure you give the token the
reposcope. -
Fetch the latest changes from upstream and check out the
mainbranch:git fetch upstream git checkout main -
Generate release notes by running the following commands on the
mainbranch:export GITHUB_TOKEN=<your GH token> export RELEASE_TAG=v1.2.3 # change this to the tag of the release to be cut make release-notes -
Review the release notes file generated at
CHANGELOG/<RELEASE_TAG>.mdand make any necessary changes:
- Move items out of “Uncategorized” into an appropriate section.
- Change anything attributed to “k8s-cherrypick-robot” to credit the original author.
- Fix any typos or other errors.
- Add the following section with a link to the full diff:
## The image for this release is:
registry.k8s.io/capi-ibmcloud/cluster-api-ibmcloud-controller:<RELEASE_TAG>

<!-- markdown-link-check-disable-next-line -->
Full Changelog: https://github.com/kubernetes-sigs/cluster-api-provider-ibmcloud/compare/v0.9.0...v0.10.0
Post release tasks:
Create a tracker issue using the release template to have a check-list that covers through all tasks that are expected to be done after the release.
Release Support Guidelines
Branches
Cluster API Provider IBM Cloud has two types of branches: the main branch and release-X branches.
The main branch is where development happens. All the latest and greatest code, including breaking changes, happens on main.
The release-X branches contain stable, backwards compatible code. On every major or minor release, a new branch is created. It is from these branches that minor and patch releases are tagged. In some cases, it may be necessary to open PRs for bugfixes directly against stable branches, but this should generally not be the case.
Support and guarantees
Cluster API Provider IBM Cloud maintains the most recent release/releases for all supported API and contract versions. Support for this section refers to the ability to backport and release patch versions; standard backport policy is defined here.
- The API version is determined from the GroupVersion defined in the top-level
api/package. - The EOL date of each API Version is determined from the last release available once a new API version is published.
| API Version | Supported Until |
|---|---|
| v1beta2 | TBD (current stable) |
| v1beta1 | EOL since 2023-02-09 |
- For the current stable API version (v1beta2) we support the two most recent minor releases; older minor releases are immediately unsupported when a new major/minor release is available.
- For older API versions we only support the most recent minor release until the API version reaches EOL.
- We will maintain test coverage for all supported minor releases for the current stable API version in case we have to do an emergency patch release. For example, if v0.5 and v0.6 are currently supported. When v0.7 is released, tests for v0.5 will be removed.
| Minor Release | API Version | Supported Until |
|---|---|---|
| v0.10.x | v1beta2 | when v0.12.0 will be released |
| v0.9.x | v1beta2 | when v0.11.0 will be released |
| v0.8.x | v1beta2 | EOL since 2025-02-12 - v0.10.0 release date |
| v0.7.x | v1beta2 | EOL since 2024-11-22 - v0.9.0 release date |
| v0.6.x | v1beta2 | EOL since 2024-05-23 - v0.8.0 release date |
| v0.5.x | v1beta2 | EOL since 2023-12-15 - v0.7.0 release date |
| v0.4.x | v1beta2 | EOL since 2023-09-07 - v0.6.0 release date |
| v0.3.x | v1beta1 | EOL since 2023-02-09 - API version EOL |
- The CAPI, k8s and test packages will receive regular updates for supported releases to ensure they remain synchronized with the CAPI release being utilized as an integral component of the provider release. This activity is ideally scheduled to occur with every new n-1 and n-2 CAPI minor releases.
- The IBM packages will be monitored for latest updates in conjunction with CAPI minor release update activity, as long as there are no disruptive changes that impact the project stability.
- Exceptions can be filed with maintainers and taken into consideration on a case-by-case basis.
How to build the machine boot images
VPC
Example
To build an image using a specific version of Kubernetes use the “PACKER_FLAGS” environment variable like in the example below:
# Clone the image-builder repository
$ git clone https://github.com/kubernetes-sigs/image-builder.git
$ cd image-builder/images/capi
$ PACKER_FLAGS="--var 'kubernetes_rpm_version=1.26.2-0' --var 'kubernetes_semver=v1.26.2' --var 'kubernetes_series=v1.26' --var 'kubernetes_deb_version=1.26.2-00'" make build-qemu-ubuntu-2004
PowerVS
Example
Compose the user-variables.json file containing the information for the PowerVS
{
  "account_id": "",
  "apikey": "",
  "capture_cos_access_key": "",
  "capture_cos_bucket": "",
  "capture_cos_region": "",
  "capture_cos_secret_key": "",
  "key_pair_name": "",
  "kubernetes_deb_version": "",
  "kubernetes_rpm_version": "",
  "kubernetes_semver": "",
  "kubernetes_series": "",
  "region": "",
  "service_instance_id": "",
  "ssh_private_key_file": "",
  "zone": "",
  "dhcp_network": "false"
}
account_id: IBM Cloud account IDapikey: IBM Cloud API Keycapture_cos_access_key: IBM Cloud Object Storage(COS) access key where the image will be exportedcapture_cos_bucket: IBM Cloud Object Storage(COS) bucket namecapture_cos_region: IBM Cloud Object Storage(COS) bucket regioncapture_cos_secret_key: IBM Cloud Object Storage(COS) secret keykey_pair_name: SSH key name present in the PowerVSkubernetes_deb_version: Kubernetes deb version, e.g: 1.24.2-00kubernetes_rpm_version: Kubernetes RPM package version, e.g: 1.24.2-0kubernetes_semver: e.g: v1.24.2kubernetes_series: e.g: v1.24region: PowerVS region, e.g: osaservice_instance_id: PowerVS service instance IDssh_private_key_file: Path to the SSH private key file used to connect to the vm while image preparation, e.g: /Users/manjunath/.ssh/id_rsazone: PowerVS zone, e.g: osa21dhcp_network: Set totrueif the image has to be built with DHCP support
Note:
- When setting
dhcp_network: true, you need to build an OS image with certain network settings using pvsadm tool and replace the fields with the custom image details.- Clone the image-builder repo and run
make buildcommands from a system where the DHCP private IP can be reached and SSH able(you can use a transit gateway with connections added for VPC and PowerVS workspace and build the image from a virtual server instance in VPC).
# Clone the image-builder repository
$ git clone https://github.com/kubernetes-sigs/image-builder.git
$ cd image-builder/images/capi
$ ANSIBLE_SSH_ARGS="-o HostKeyAlgorithms=+ssh-rsa -o PubkeyAcceptedAlgorithms=+ssh-rsa" PACKER_VAR_FILES=user-variables.json make build-powervs-centos-8
Modules and tools dependencies
CAPI Packages
| Package | Module name | Used by |
|---|---|---|
| cluster-api | sigs.k8s.io/cluster-api | go.mod |
| cluster-api/test | sigs.k8s.io/cluster-api/test | go.mod |
| cluster-api/hack/tools | sigs.k8s.io/cluster-api/hack/tools | hack/tools/go.mod |
| Package | Module name | Used by |
|---|---|---|
| api | k8s.io/api | go.mod |
| apiextensions-apiserver | k8s.io/apiextensions-apiserver | go.mod |
| apimachinery | k8s.io/apimachinery | go.mod |
| cli-runtime | k8s.io/cli-runtime | go.mod |
| client-go | k8s.io/client-go | go.mod |
| utils | k8s.io/utils | go.mod |
| controller-runtime | sigs.k8s.io/controller-runtime | go.mod |
| controller-runtime/tools/setup-envtest | sigs.k8s.io/controller-runtime/tools/setup-envtest | hack/tools/go.mod |
| controller-tools | sigs.k8s.io/controller-tools | hack/tools/go.mod |
| Package | Module name | Used by |
|---|---|---|
| onsi/ginkgo/v2 | github.com/onsi/ginkgo/v2 | go.mod hack/tools/go.mod |
| onsi/gomega | github.com/onsi/gomega | go.mod |
Note: The K8s and Test packages are subject to updates with each new CAPI package release.
IBM Packages
| Package | Module name | Used by |
|---|---|---|
| IBM-Cloud/power-go-client | github.com/IBM-Cloud/power-go-client | go.mod |
| IBM/go-sdk-core/v5 | github.com/IBM/go-sdk-core/v5 | go.mod |
| IBM/platform-services-go-sdk | github.com/IBM/platform-services-go-sdk | go.mod |
| IBM/vpc-go-sdk | github.com/IBM/vpc-go-sdk | go.mod |
Tools used by E2E tests.
| Package | Used by | GitHub |
|---|---|---|
| IBM Cloud CLI | ci-e2e.sh | ibm-cloud-cli-release |
| capibmadm | ci-e2e.sh | capibmadm |
Other Tools
| Package | Used by | Source |
|---|---|---|
| kind | ensure-kind.sh | kind |
| kubebuilder-tools | fetch_ext_bins.sh Makefile | kubebuilder-tools |
E2E Testing
Introduction
- The end-to-end tests for
VPCandPowerVSrun on an internal prow cluster on IBM Cloud. - Resource management is handled via boskos which is an efficient way to lease infra and clean up after every run.
- The E2E tests use the Cluster API test framework. For more information on developing E2E tests, refer here.
Jobs
The following periodic jobs are being run on main branch once every day.
We also test the last two releases, once every week.
Running the end-to-end tests locally
For development and debugging the E2E tests, they can be executed locally.
- Set the flavor you want to test. By default it is set to
powervs-md-remeditaion.
export E2E_FLAVOR=<e2e-flavor>
- Set the infra environment variables accrodingly based on the flavor being tested. Check the required variables for VPC and PowerVS being set in ci-e2e.sh.
- Run the e2e test
./scripts/ci-e2e.sh
Troubleshooting
1. Tilt stops working as not able to connect to kind cluster
% kind get clusters
 enabling experimental podman provider
 ERROR: failed to list clusters: command "podman ps -a --filter label=io.x-k8s.kind.cluster --format '{{index .Labels "io.x-k8s.kind.cluster"}}'" failed with error: exit status 125
 Command Output: Cannot connect to Podman. Please verify your connection to the Linux system using `podman system connection list`, or try `podman machine init` and `podman machine start` to manage a new Linux VM
 Error: unable to connect to Podman socket: failed to connect: dial tcp 127.0.0.1:61514: connect: connection refused
- Stop and start the Podman either via cli or from Podman Desktop.
$ podman machine stop $ podman machine start - Run all the stopped containers like capi-test-control-plane, capi-test-worker, kind-registry.
$ podman container list -a CONTAINER ID IMAGE NAMES 512cee59230c docker.io/library/registry:2 kind-registry 5b99fd84c41e docker.io/kindest/node@sha256 capi-test-worker 94130af58929 docker.io/kindest/node@sha256 capi-test-control-plane $ podman container start 512cee59230c 5b99fd84c41e 94130af58929 - Try re-running
tilt upfromcluster-apidirectory.
2. SSH into data/control plane node configured with DHCP network
-
Since the VM backing the node is configured with DHCP network which is private we can’t directly SSH into it.
-
Create a public VM in the same workspace and attach the DHCP network to it.
- Create public network in PowerVS workspace if it does not exist using ibmcloud cli
$ibmcloud pi subnet create publicnet1 --net-type public- List the available images to create VM
$ibmcloud pi image lc- Create the VM with public and DHCP subnet.
$ibmcloud pi instance create publicVM --image testrhel88 --subnets DHCPSERVERcapi-powervs-new_Private,publicnet1- Get the public IP of created VM
$ibmcloud pi ins get publicVM -
SSH into the DHCP VM using public VM as a jump host.
ssh -J root@<public_ip> root@<dhcp_ip>
3. Failed to apply a cluster template with release not found error
While trying to apply a cluster template from unreleased version like from main branch, we will run into error like release not found for version vX.XX.XX. In that case, instead of --flavor we need to use --from=<path_to_cluster_template>.
4. Debugging Machine struck in PROVISIONED phase
-
A Machine’s Running phase indicates that it has successfully created, initialised and has become a Kubernetes Node in a Ready state.
-
Sometimes a machine will be in Provisioned phase forever indicating infrastructure has been created and configured but yet to become a Kubernetes node.
-
Cloud controller manager(CCM) takes care of turning a machine into a node by fetching and initialising with appropriate data from cloud.
-
As a part of cluster create template we make use of ClusterResourceSet to apply the CCM resources into the workload cluster.
-
Check the machine’s current status
$ kubectl get machines NAME CLUSTER NODENAME PROVIDERID PHASE AGE VERSION powervs-control-plane-pqnt4 powervs ibmpowervs://osa/osa21/10b1000b-da8d-4e18-ad1f-6b2a56a8c130/bc0c9621-12d2-47f1-932e-a18ff041aba2 Provisioned 5m36s v1.31.0 -
Verify that the ClusterResourceSet is applied to the workload cluster
$ kubectl get clusterresourceset NAME AGE crs-cloud-conf 10m $ kubectl describe clusterresourceset crs-cloud-conf . . Status: Conditions: Last Transition Time: 2025-05-06T08:36:40Z Message: Observed Generation: 1 Reason: Applied Status: True Type: ResourcesApplied Last Transition Time: 2025-05-06T08:31:27Z Message: Observed Generation: 1 Reason: NotPaused Status: False Type: Paused -
Verify that the CCM resources are created in the workload cluster
-
Get the workload cluster kubeconfig
$ clusterctl get kubeconfig powervs > workload.conf -
Check the CCM daemonset’s status
$ kubectl get daemonset -n kube-system --kubeconfig=workload.conf NAME DESIRED CURRENT READY UP-TO-DATE AVAILABLE NODE SELECTOR AGE ibmpowervs-cloud-controller-manager 2 2 2 2 2 node-role.kubernetes.io/control-plane= 45m -
Check the logs of CCM
$ kubectl -n kube-system get pods --kubeconfig=workload.conf ibmpowervs-cloud-controller-manager-472lq 1/1 Running 1 (45m ago) 46m ibmpowervs-cloud-controller-manager-fw47h 1/1 Running 1 (38m ago) 38m $ kubectl -n kube-system logs ibmpowervs-cloud-controller-manager-472lq --kubeconfig=workload.conf I0506 09:23:51.420992 1 ibm_metadata_service.go:206] Retrieving information for node=powervs-control-plane-ftd8j from Power VS I0506 09:23:51.421003 1 ibm_powervs_client.go:270] Node powervs-control-plane-ftd8j found metadata &{InternalIP:192.168.236.114 ExternalIP:163.68.98.114 WorkerID:001275c5-f454-4944-8419-61c16f16f8b7 InstanceType:s922 FailureDomain:osa21 Region:osa ProviderID:ibmpowervs://osa/osa21/10b1000b-da8d-4e18-ad1f-6b2a56a8c130/001275c5-f454-4944-8419-61c16f16f8b7} from DHCP cache I0506 09:23:51.421038 1 node_controller.go:271] Update 3 nodes status took 7.03624ms. -
Check the cloud-conf config map
$ kubectl -n kube-system get cm ibmpowervs-cloud-config -o yaml --kubeconfig=workload.conf apiVersion: v1 kind: ConfigMap metadata: creationTimestamp: "2025-05-06T08:36:39Z" name: ibmpowervs-cloud-config namespace: kube-system resourceVersion: "329" uid: ae2bd436-0b1e-4534-9c6c-48f717f6f47e data: ibmpowervs.conf: | [global] version = 1.1.0 [kubernetes] config-file = "" [provider] cluster-default-provider = g2 . . -
Check whether the secret is configured with correct IBM Cloud API key.
$ kubectl -n kube-system get secret ibmpowervs-cloud-credential -o yaml --kubeconfig=workload.conf
-
-
Check whether the node is initialised correctly and does not have taint
node.cloudprovider.kubernetes.io/uninitializedtaint$ kubectl get nodes --kubeconfig=workload.conf NAME STATUS ROLES AGE VERSION powervs-control-plane-ftd8j NotReady control-plane 53m v1.31.0 powervs-control-plane-pqnt4 NotReady control-plane 61m v1.31.0 powervs-md-0-2dnrm-8658c NotReady <none> 56m v1.31.0 $ kubectl get node powervs-control-plane-ftd8j -o yaml --kubeconfig=workload.conf apiVersion: v1 kind: Node metadata: annotations: cluster.x-k8s.io/annotations-from-machine: "" cluster.x-k8s.io/cluster-name: powervs cluster.x-k8s.io/cluster-namespace: default cluster.x-k8s.io/labels-from-machine: "" cluster.x-k8s.io/machine: powervs-control-plane-ftd8j cluster.x-k8s.io/owner-kind: KubeadmControlPlane cluster.x-k8s.io/owner-name: powervs-control-plane kubeadm.alpha.kubernetes.io/cri-socket: unix:///var/run/containerd/containerd.sock node.alpha.kubernetes.io/ttl: "0" volumes.kubernetes.io/controller-managed-attach-detach: "true" -
On the successful CCM initialisation the machine will turn into Running phase and corresponding NODENAME field will be populated.
NAME                          CLUSTER   NODENAME                      PROVIDERID                                                                                         PHASE          AGE     VERSION
powervs-control-plane-pqnt4   powervs   powervs-control-plane-pqnt4   ibmpowervs://osa/osa21/10b1000b-da8d-4e18-ad1f-6b2a56a8c130/bc0c9621-12d2-47f1-932e-a18ff041aba2   Running        8m52s   v1.31.0
Reference
Further references to the Cluster API Provider IBM Cloud - CAPIBM project.
API References
Cluster API Provider IBMCloud currently exposes the following APIs:
-
The Cluster API Provider IBMCloud Custom Resource Definitions (CRDs): documentation
-
Golang APIs: godoc
Regions-Zones Mapping
| Geography | Location | powervs regions | powervs zones | powervs service endpoint URL (public) | ibmcloud_vpc regions | ibmcloud_vpc zones | vpc service endpoint URL (public) | transit gateway locations |
|---|---|---|---|---|---|---|---|---|
| America | Dallas, USA | us-south | us-south dal10 dal12 | us-south.power-iaas.cloud.ibm.com | us-south | us-south-1 us-south-2 us-south-3 | us-south.iaas.cloud.ibm.com | us-south |
| America | Washington DC, USA | us-east | us-east wdc06 wdc07 | us-east.power-iaas.cloud.ibm.com | us-east | us-east-1 us-east-2 us-east-3 | us-east.iaas.cloud.ibm.com | us-east |
| America | São Paulo, Brazil | sao | sao01 sao04 | sao.power-iaas.cloud.ibm.com | br-sao | br-sao-1 br-sao-2 br-sao-3 | br-sao.iaas.cloud.ibm.com | br-sao |
| America | Toronto, Canada | tor | tor01 | tor.power-iaas.cloud.ibm.com | ca-tor | ca-tor-1 ca-tor-2 ca-tor-3 | ca-tor.iaas.cloud.ibm.com | ca-tor |
| America | Montreal, Canada | mon | mon01 | mon.power-iaas.cloud.ibm.com | - | - | - | - |
| Europe | Frankfurt, Germany | eu-de | eu-de-1 eu-de-2 | eu-de.power-iaas.cloud.ibm.com | eu-de | eu-de-1 eu-de-2 eu-de-3 | eu-de.iaas.cloud.ibm.com | eu-de |
| Europe | London, UK | lon | lon04 lon06 | lon.power-iaas.cloud.ibm.com | eu-gb | eu-gb-1 eu-gb-2 eu-gb-3 | eu-gb.iaas.cloud.ibm.com | eu-gb |
| Europe | Madrid | mad | mad02 mad04 | mad.power-iaas.cloud.ibm.com | eu-es | eu-es-1 eu-es-2 eu-es-3 | eu-es.iaas.cloud.ibm.com | eu-es |
| Asia Pacific | Sydney, Australia | syd | syd04 syd05 | syd.power-iaas.cloud.ibm.com | au-syd | au-syd-1 au-syd-2 au-syd-3 | au-syd.iaas.cloud.ibm.com | au-syd |
| Asia Pacific | Tokyo, Japan | tok | tok04 | tok.power-iaas.cloud.ibm.com | jp-tok | jp-tok-1 jp-tok-2 jp-tok-3 | jp-tok.iaas.cloud.ibm.com | jp-tok |
| Asia Pacific | Osaka, Japan | osa | osa21 | osa.power-iaas.cloud.ibm.com | jp-osa | jp-osa-1 jp-osa-2 jp-osa-3 | jp-osa.iaas.cloud.ibm.com | jp-osa |
| Asia Pacific | Chennai, India | che | che01 | che.power-iaas.cloud.ibm.com | - | - | - | - |